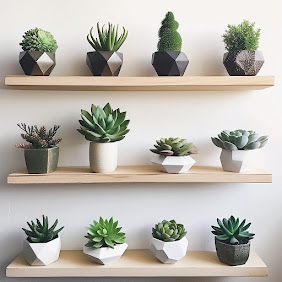
How to Create Floating Shelves: A Chic & Simple Guide Step by Step
Floating shelves are a perfect blend of style and functionality, offering a minimalist approach to organizing and decorating your space. Whether you're looking to display your favorite books, plants, or art, floating shelves are a chic addition to any room. In this guide, we'll walk you through the process of creating your own floating shelves at home, step by step. Plus, we’ll include some of our favorite products that will make your DIY project even easier.
Materials You’ll Need:
- Wood planks (Choose a finish that complements your space. You can find a great selection of wood planks here and here.)
- Brackets or mounting hardware (Opt for invisible brackets for a true floating effect. Check out these top-rated brackets on Amazon.)
- Screws and wall anchors (Make sure they’re appropriate for your wall type. This all-in-one set is a must-have.)
- Level (A good level ensures your shelves are perfectly aligned. This level is highly recommended.)
- Drill (A reliable drill is essential for this project. You can’t go wrong with this drill.)
- Measuring tape (Accurate measurements are key to a professional look. Consider this measuring tape.)
Step-by-Step Guide:
1.Choose Your Location
Start by selecting the perfect spot for your floating shelves. Consider areas that could use a touch of style and organization, like above your sofa, beside your bed, or in the kitchen. Use a pencil to mark where you want the shelves to go.
2.Measure and Mark
Use your measuring tape to determine the length and placement of your shelves. Mark the positions for the brackets or mounts on the wall, ensuring they are level and evenly spaced.
3.Install the Brackets
Using your drill, attach the brackets or mounting hardware to the wall. Be sure to use wall anchors if you’re drilling into drywall to ensure a secure hold. Double-check that the brackets are level before tightening the screws completely.
4.Prepare the Wood Planks
Cut your wood planks to the desired length, if necessary. Sand the edges for a smooth finish. If you prefer a stained or painted look, now’s the time to finish your wood planks to match your home decor.
5.Mount the Shelves
Slide the wood planks onto the brackets. Ensure they are secure and level. If needed, add screws from the underside to keep the shelf in place.
6.Style Your Shelves
Now for the fun part! Decorate your new floating shelves with books, plants, candles, or art. Keep the styling simple and chic, aligning with your overall home aesthetic.
Pro Tip:
To maintain the minimalist look, avoid overcrowding your shelves. Stick to a neutral color palette and mix in a few textural elements like woven baskets or ceramic vases for added interest.


Comments
Post a Comment